Recipe for Tenerina Cake, a typical dessert from Ferrara
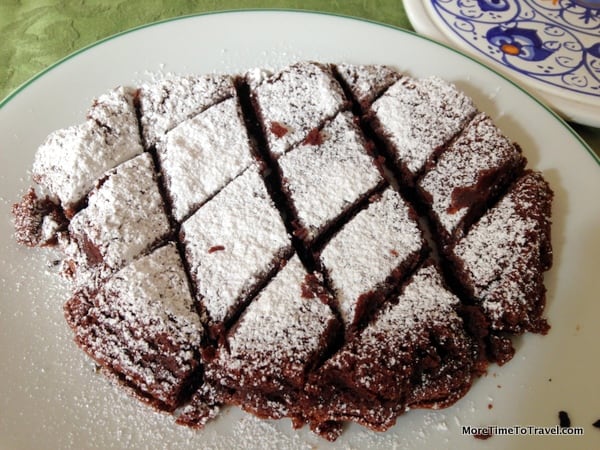
Cesarina Luisa’s recipe for Tenerina Cake
This moist dark chocolate Tenerina cake was one of the dishes we learned to prepare during our HomeFood cooking experience with Luisa Mambelli in Bologna.
The recipe was simple with few ingredients yet tasted absolutely delicious. It was crisp on the top and soft inside.
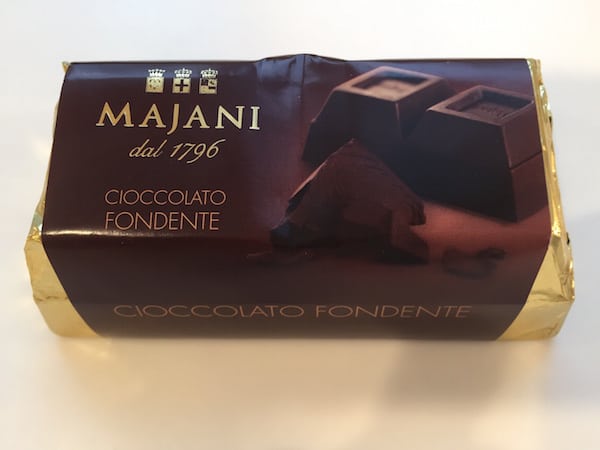
Luisa used a chunk of dark chocolate from Majani, a famous chocolatier in Bologna. We liked the cake so much that we purchased a chunk to take home (giving me an excuse to visit the shop for a second time during my stay).
This “easy-to-bake” Tenerina Cake is a typical confectionary from the nearby city of Ferrara, also in the Emilia Romagna region.
The name tenerina literally means “tender-heart.” According to TastingTable, the name references the moist center of the cake as well as the “sweet demeanor” of Queen Elena who was so beloved that the cake was created in honor of her love for King Victor Emanual III.
THE RECIPE FOR TENERINA CAKE
Ingredients for 4 people:

- 200 g. high quality dark chocolate 55% (about 7 ounces)
- 100 g. butter (a little more than 7 tablespoons)
- 100 g. sugar (1/2 cup)
- 60 g. flour (1/2 cup)
- 4 egg yolks
- 4 egg whites
- splash of milk
- Powdered sugar
Total preparation time:
20 minutes
Total baking time:
35 minutes
Preparation:
- Pre-heat the oven to 200° C (or 390°F)
- Shave the dark chocolate into small pieces and place the pieces into a pan with a splash of milk. (As you’re shaving it, resist the temptation to eat it and mess up the measured amount.)

- Melt the chocolate in a bowl in a double boiler or in the microwave on low power.

- As soon as the chocolate has melted, remove it from the heat and add the sugar, mixing it slowly until it is well mixed and smooth.
- Add the butter, which has previously been cut into cubes and mix well with the wooden spoon.
- Add only the egg yolks one at a time (reserving the whites).
- Once the eggs are well mixed, add the flour one spoonful at a time continuing to mix slowly.
- In a separate bowl, whisk the egg whites until stiff. Then slowly fold into the chocolate mixture. The mixture should be smooth and creamy. If it is too thick, add a little bit more milk.
- Pour into a well buttered and floured round baking tin (we used wax paper).
- Bake at 200°C (or 390°F) for the first 10 minutes then lower the temperature to 180°C (or 355°F) for the remaining 25 minutes.

- Turn upside down on serving plate and sprinkle with powdered sugar.


Mangia!
A post-mortem
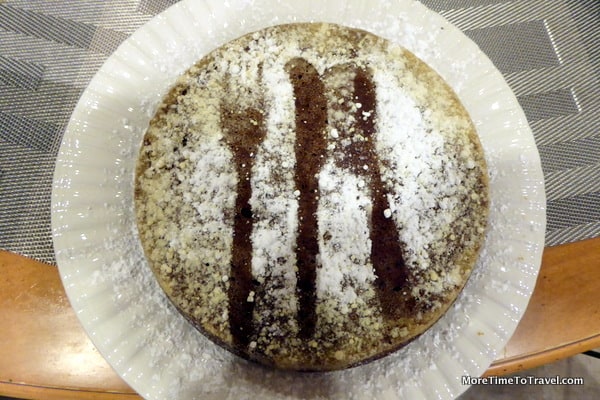
Before I published this, I wanted to make the recipe at home—and a snowy day provided the perfect occasion. Spoiler alert: It wasn’t as easy as it seemed to be in Italy. What I learned from my home cooking experience at home:
- The prep time for a mere mortal to bake a cake is triple the time it takes for a Cesarina. It took me a good hour to prepare the batter, not 20 minutes.
- Shaving 200 grams of chocolate is hard work and builds muscles.
- Converting ingredients from metric to the English system of measures isn’t a proverbial “piece of cake.” I learned that 100 grams of sugar and 60 grams of flour both equal 1/2 cup. Who knew?
- The oven temperatures in European recipes are Centigrade rather than Fahrenheit. Unfortunately, I didn’t realize this until I had already put the batter in the oven at too low a temperature. When Jerry alerted me to the mistake, I had to take the pan out of the oven and wait until the oven temperature rose before putting it in again.
- Don’t sprinkle powdered sugar before the cake has fully cooled!
- It’s a privilege to NOT have to wash the pots and pans after a cooking class.
- Chocolate cake tastes infinitely better in Bologna than it does in New York.
Obviously, I need more practice. While my Tenerina cake tasted good, it wasn’t what Jerry or I remembered. For one thing, it wasn’t nearly as moist as Luisa’s. Guess I just need to return for another lesson.



I don’t “do kitchen,” but I would sure sample your masterpiece!!!!!
You’re kind, Marilyn but my picture is at the bottom—not the top:-)
Irene! What a trooper you are! Although your cake is not as pretty… it will be next time. Just by letting it cool first you will have different results. I plan to make this when I have a kitchen again (after the renovation) Loved your “sweet” post!
I think your effort looks pretty good, all things considered. Still, you’re right: things never come out as well when we make them ourselves and we yearn for the original!
Irene! This looks delish!!! I am definitely going to give this a try. Thanks for the post-mortem. It seems that my first time trying a recipe is always hard and I always have to tweak things the next time around. Your tips are very helpful.
My take on the cake:
https://www.facebook.com/media/set/?set=a.10152020561687058.1073741834.669272057&type=1&l=011db07946
Notes:
Irene and I determined that using fresh eggs is critical to the egg whites stiffening up. Also, to get really frothy egg whites, use the whisk attachment on your hand mixer.
Irene’s tip to wait until the cake was completely cooled before adding the powdered sugar was very helpful.
I see no point in shaving the chocolate because once it’s melted the end result is the same. I used dark chocolate morsels and part of a dark chocolate bar.
I used disposable pans by chance but they gave the cake a pretty fluted edge!
Thanks for sharing your experience, Irene! BTW, you nails always look so pretty, you could be a hand model!
Thanks for being a tester! Looks like you did a great job!
It was fun stepping out of my boxed mix comfort zone!
And success is such a confidence-booster. Guess this will lead to more! 🙂
I’ll make you one for your birthday but before then, I doubt it. It actually tastes even better today!
Delicious, thank you 🙂
Your Family Will LOVE These Cakes!